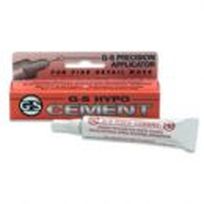
G-S Hypo Glue
This is G-S Hypo glue. It is an ideal cement for attaching aircraft canopies and vehicle windows etc, and dries clear. The application nozzle is extremely fine for precise placement, and the cap includes a built in needle, which means the nozzle never gets blocked. See it at www.finescalemodelworld.co.uk or follow the "useful addresses" link on the homepage.
For further information, contact Steve on 07780 097503 or 01902 650077 Clean MusclesUploaded 10th June 2012
This tip is reasonably well known, but for you out there that have never heard this, read on. Made a mess of your paintwork? Don't like the finish? Well, if you are working in plastic, don't despair, strip it off! Place the offending piece on to a suitable flat surface, (not the wife's best china plate), and place it inside a plastic bag, a carrier bag is ideal. Spray the piece with Mr. Muscle oven cleaner, seal the bag, and leave for 24 hours. Remove from bag, and gently rinse your model piece in warm water. Any stubborn residue left, can be gently removed with an old toothbrush or suchlike. Before re-painting, make sure the piece is completely dry. Now get rid of the plastic bag sensibly! Static Grass
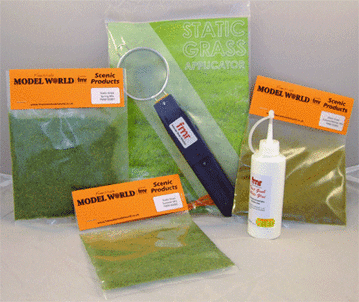
This is a Static Grass Applicator, and comes as a separate unit, or as a starter set which is shown here. I saw this working yesterday, and is an excellent piece of kit for laying down static grass on a diorama base.
The grasses come in several different sizes and shades to match your requirements, together with a "quick grab" glue. For the bigger projects, the applicator is also available in a larger size. If you would like to know more, see www.finescalemodelworld.co.uk or follow the "useful addresses" link on the homepage For further information, contact Steve on 07780 097503 or 01902 650077 Gettin' some StaticUploaded 25th April 2012
If you possess some static grass and the applicator, (see useful bits and pieces), here is another method of applying the grass to a small area, like say, in between railway sleepers, or between stones and rocks etc. Onto a piece of glass, (must be glass, as the grass is difficult to remove from any other material), spread some quick grab glue, say about 10 - 12 square centimetres, (no need to be exact), and then apply the static grass of your choice with the applicator, onto the glued area, using infill material if necessary, so that the glued area is nicely covered. Leave this to dry thoroughly. When you are satisfied that it is completely dry, take a sharp blade, and carefully slide it between the glued area and the glass, and gently remove it, lifting and supporting it, as you go along. The quick grab glue dries clear, so this small piece of ready laid grass can be cut up into pieces of whatever size and shape you want, and then laid where you like. "Anyone for bowls"??? |
Rust EffectUploaded 1st July 2012
The next three pictures show the results of a really good product for all you diorama builders out there, or for that matter, if you just want to rust a few bits on your vehicle. It's called "Rust Effect" and is by a company called ModelMates. It is water soluble, fast drying and opaque. It can be used straight from the container, and i'm very pleased with the result. Have a look at the pictures, and make your own mind up. the pics are just of a couple of door hinges on a Miniart building kit. It's not cheap at £8, but you only use a little at a time, so should last for quite a while. I purchased mine from Eileen's Emporium in Gloucester. Down 'n DirtyOne of the most difficult things to achieve in my opinion, is to make plastic items, with a wood finish, look authentic. There are numerous ideas about, but this method is one i've used quite often, and seems to get good results.
Lay down a light base colour, say white or light stone,( depending what colour of finish you require), onto your surface and let that coat dry thoroughly. When completely dry, apply a thin black wash, making sure it flows into all the cracks and blemishes. When this wash has dried completely, take a fine piece of wire wool, or one of these fine wire pads, and proceed to lightly rub over the piece, until the bottom layer of basecoat starts to show through the wash. Continue with this until you are pleased with the resulting grainy effect. Now, just dry brush to your requirements. If you require a different shade of wood, use a brown wash instead of the black. Also, to experiment, use a different base colour, and vary the washes. The important thing to remember, is to ensure each coat of colour is dry, before you attempt the next phase. Recently, i scratch-built some buffer stops for a rail end on a diorama. In this case i used balsa wood, and i experimented with putting a black wash straight onto raw wood. As you know, balsa wood is very porous, and i thought that the end result was very good, making it look well-worn and uncared for. Some rust colour on the metal parts, and finally, some dry-brushing, and the end result was very pleasing. The point i'm trying to make is, "have a go". You'll never know how it will turn out. |

|
|


