These pages will feature "Build Blogs"
This is so that the normal "blog" page, and the "gallery"
pages, don't get too cluttered.
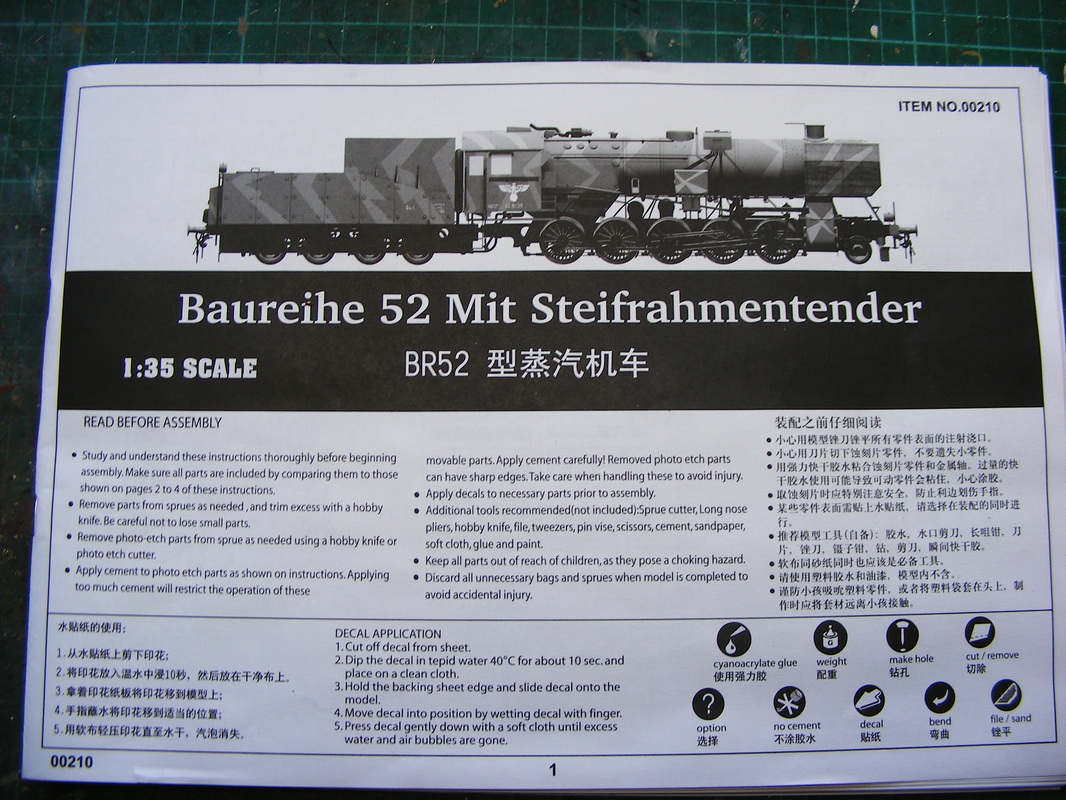
Building Trumpeter's 1/35 Baureihe 52 mit Steifrahmentender
Wednesday 11th July 2012
Well, it's arrived, the Trumpeter 1/35 BR 52 kriegslok locomotive and tender kit, so together with a resin & photo-etched upgraded conversion kit from Lion Roar, it should prove to be quite a project. This kit is one i've had my eye on building for quite a while now, taking into account my interest in railways and so have decided to take the plunge at last. I will include a run down of the kit first, together with a description of the sprues, parts, etc, and then i will take photo's as i build and paint the kit. Hope you enjoy watching it being built, but be patient, this is one big kit!
Firstly, a little about the kit.
The box itself is enough to make you wonder, "what have i done".
This alone measures 58cms x 34cms x 13cms deep, and on opening it up, there is no spare room inside at all. There are no less than 17 sprues, a box containing the embankment sections, another smaller box containing the glazing sprue, together with a small photo-etched fret and a decal sheet. Also inside is a cardboard sheet containing 2 sets of soft rubber moulded sand dispensing tubes. All together about 710 parts.
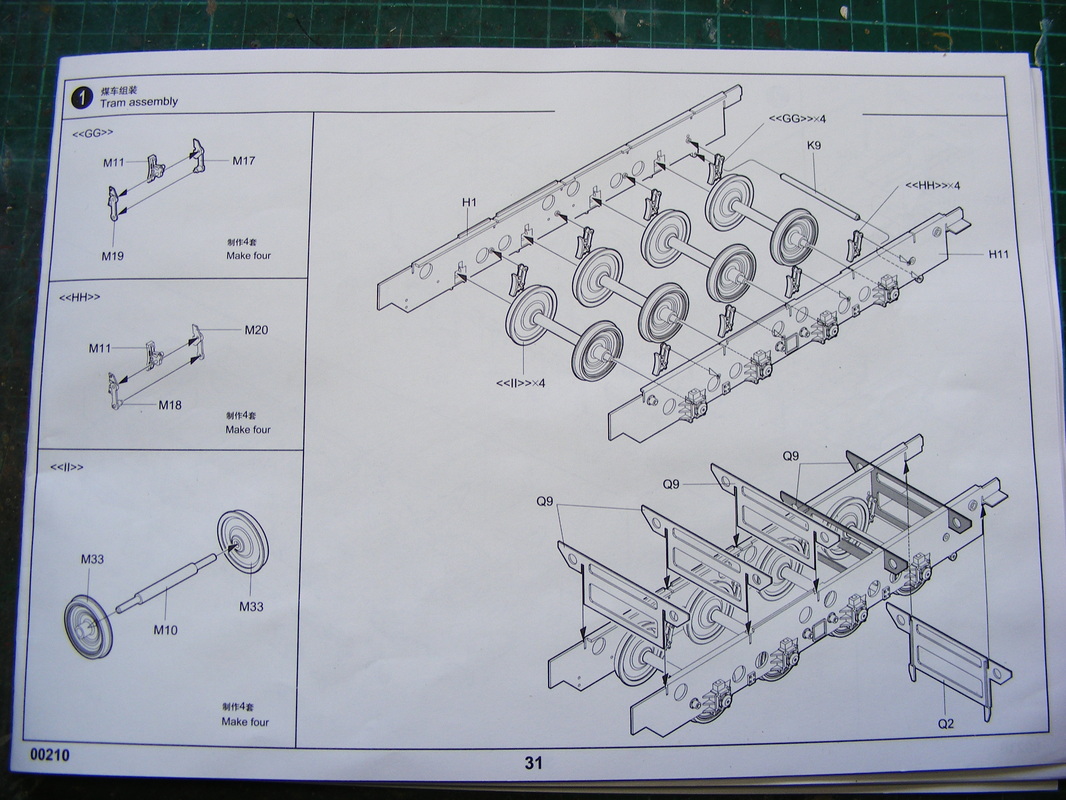
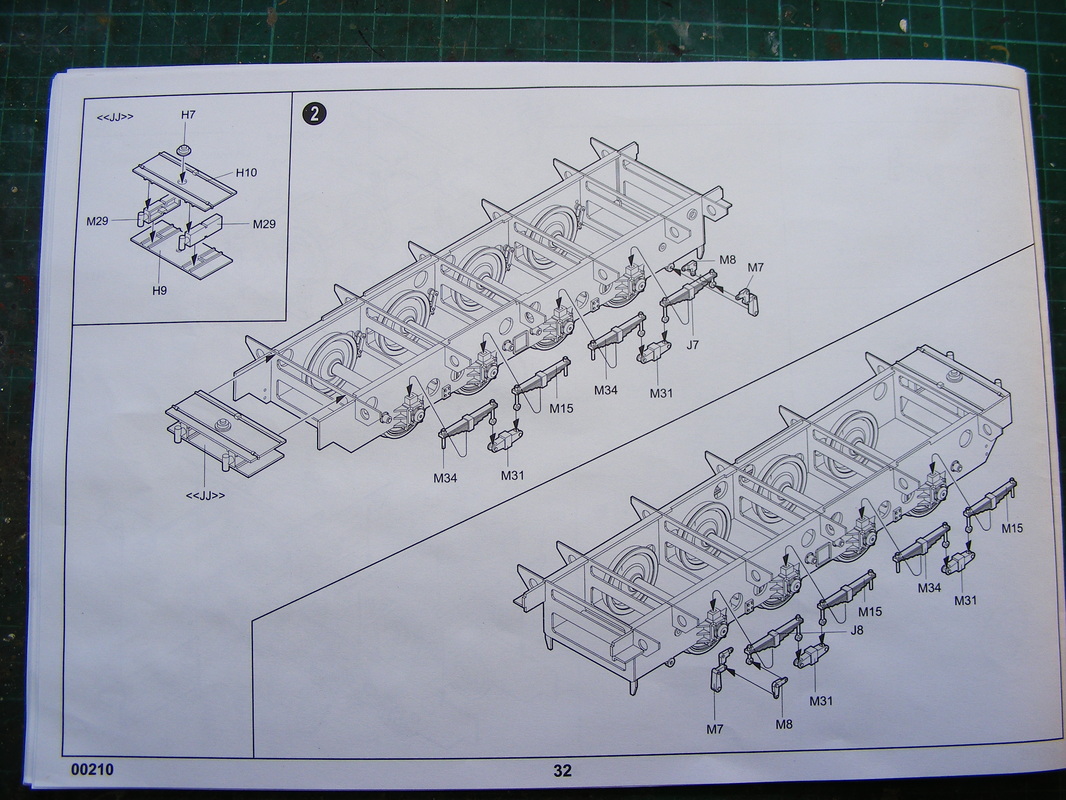
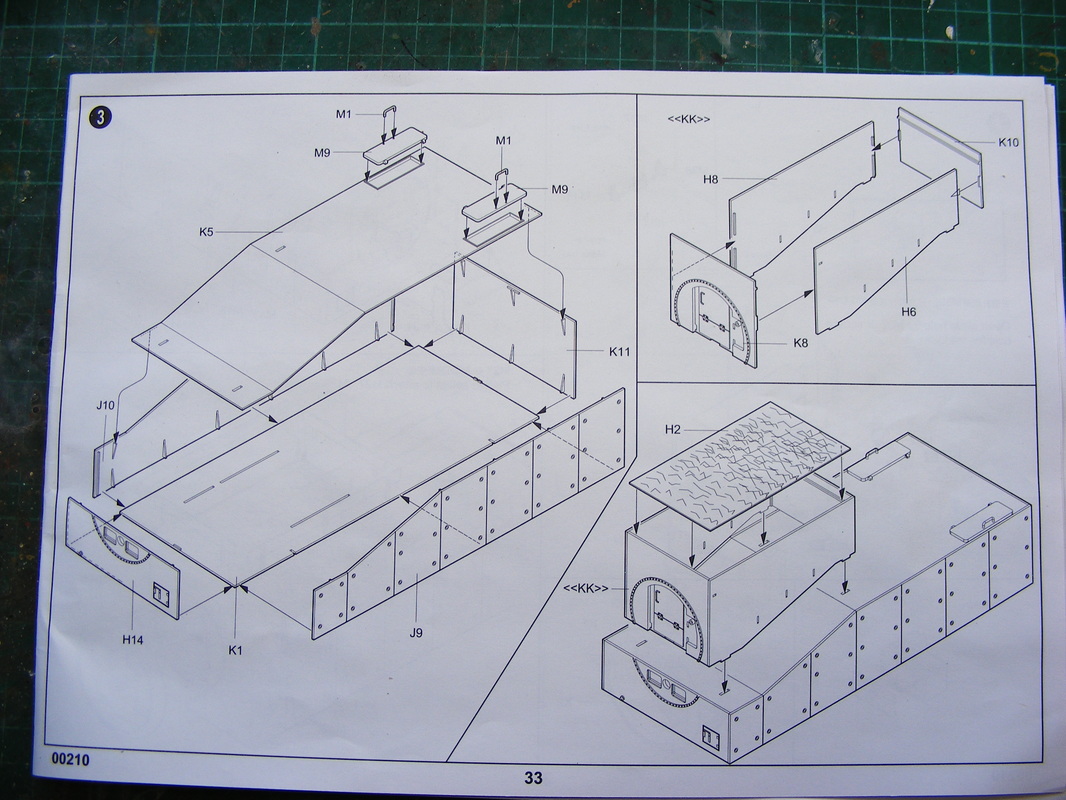
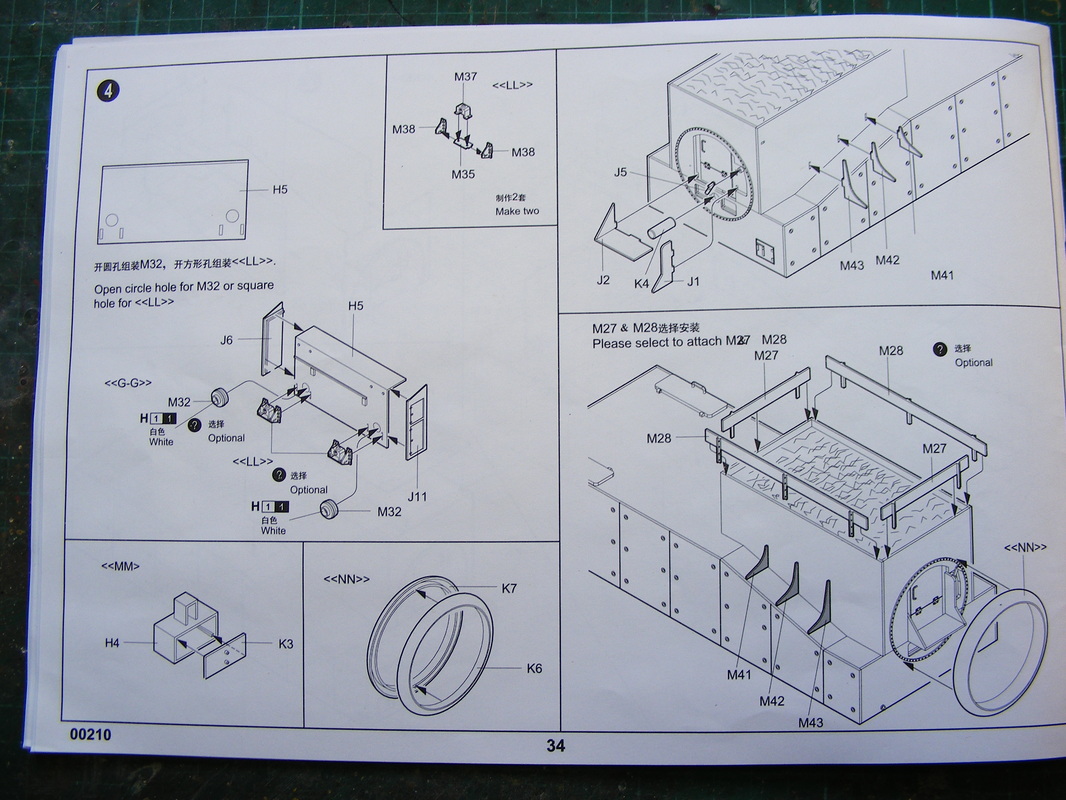
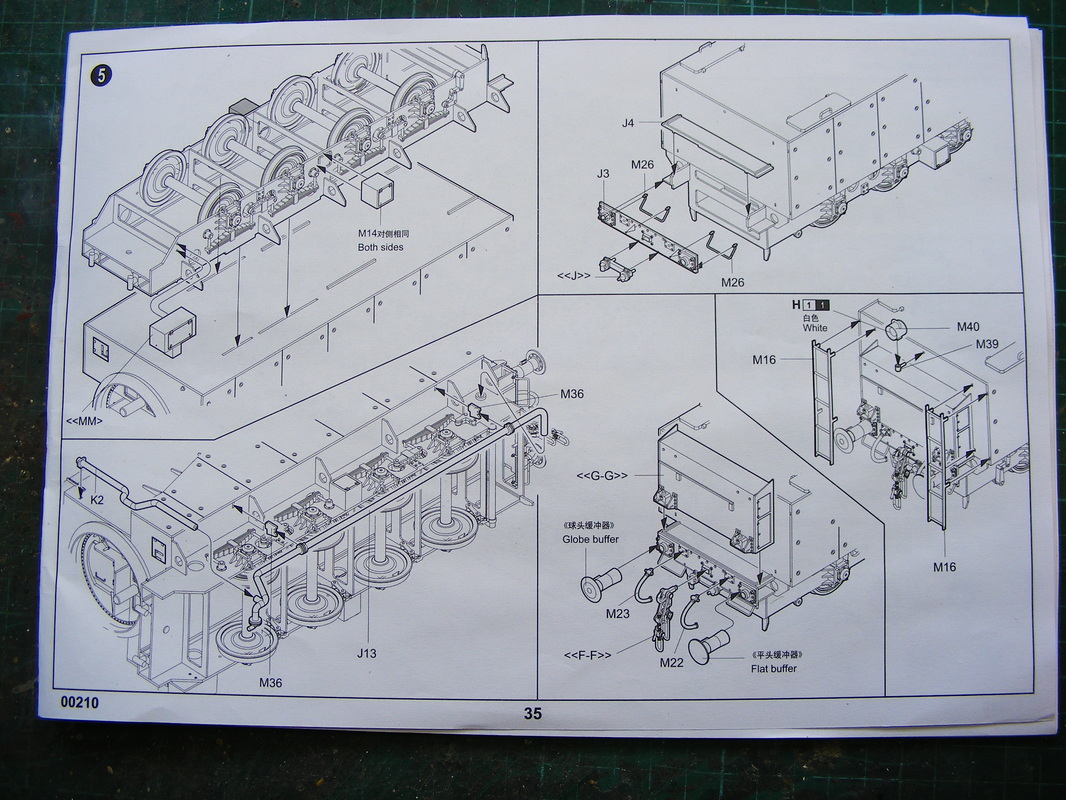
As is pretty standard from Trumpeter, there is a very well illustrated set of assembly instructions,
contained within a 36 page booklet, together with a colour sheet, showing 2 colour schemes, namely the DB black and red, and the reichbahn field grey with a yellow camoflage striping.
All in all then, quite a bit to be getting on with.
When completed the model measures a whopping, 886mm long x 87mm wide x 134.2mm tall.
So there you have it. I hope you will want to see the progress as i go along, so watch this page, as together with photographs, i'll endeavor to keep you posted of my progress.
Now, where do i start?????? Mmmmmmm...........
Think i'll construct the tender first..........
Saturday 14th. July 2012
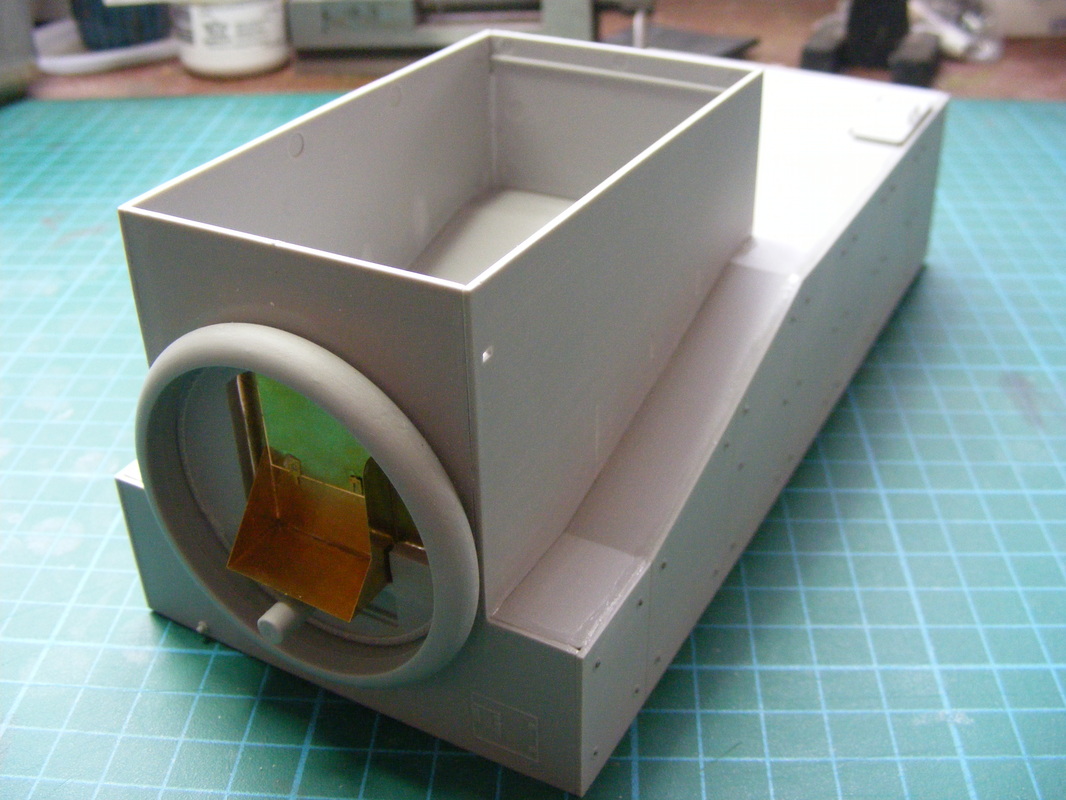
The tender seems to be coming along quite well as you can see from the pictures.
The tender chassis is not assembled as yet because of pre-painting, and the chassis frames have a lot of quite large sink holes which need to be filled. Also, there seems an awful lot of clearance in the wheel bores and the axle diameters, which meant i had to be very careful, to get them central on the axles. The coal hopper needs to have a false bottom of plastic card inserted, as the piece of styrene card/coal supplied with the kit is not very realistic. I'm going to try and use some real coal chippings on this model. When installed in the hopper, the plan is to seal the chippings with a coat of liquid floor polish.
I've started to use some of the parts from the Lion Roar etched brass kit, but i have to admit, some of the pieces are extremely difficult to handle due to the size. We'll see how it progresses.
Oh yes, one more thing, the sides of the water tank of the tender, appear to have hollow head rivets, which means there is an indentation in the mouldings to represent the rivets.
On doing a little research, this mark of tender had dome head rivets, not flush head, so each of these indentations have to be filled in using simulated dome head rivets. Should look ok when painted over. There are 38 on each side!

Tuesday 17th July 2012
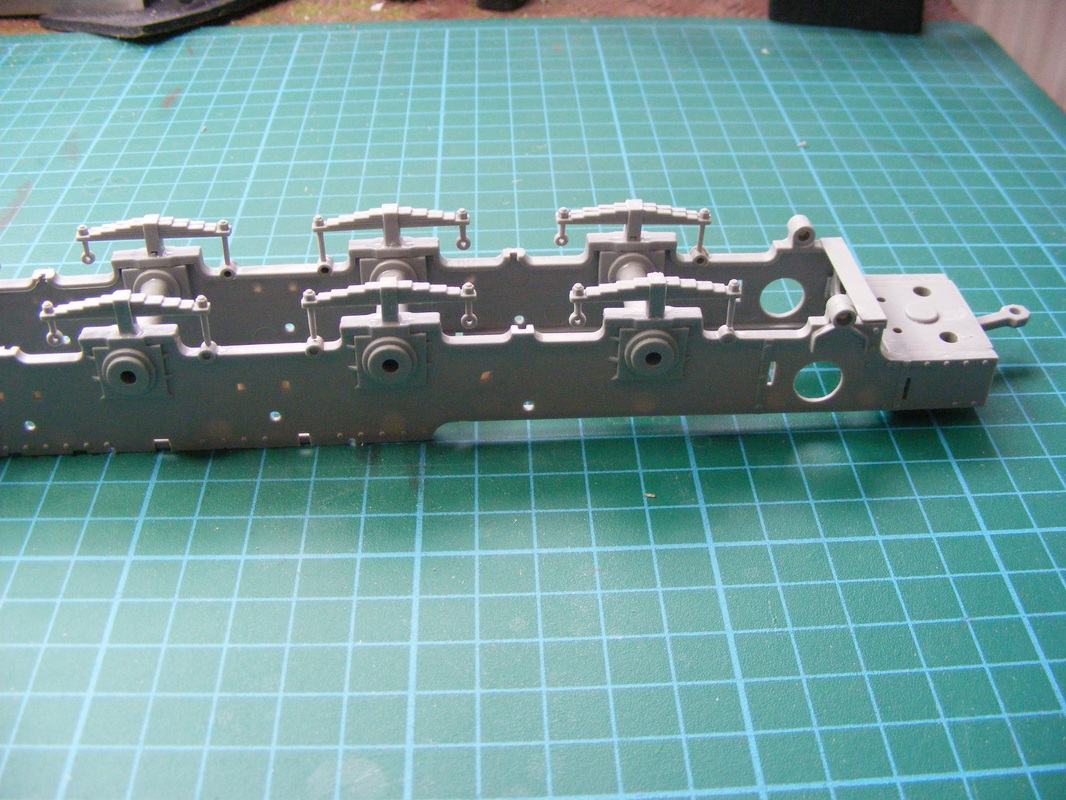
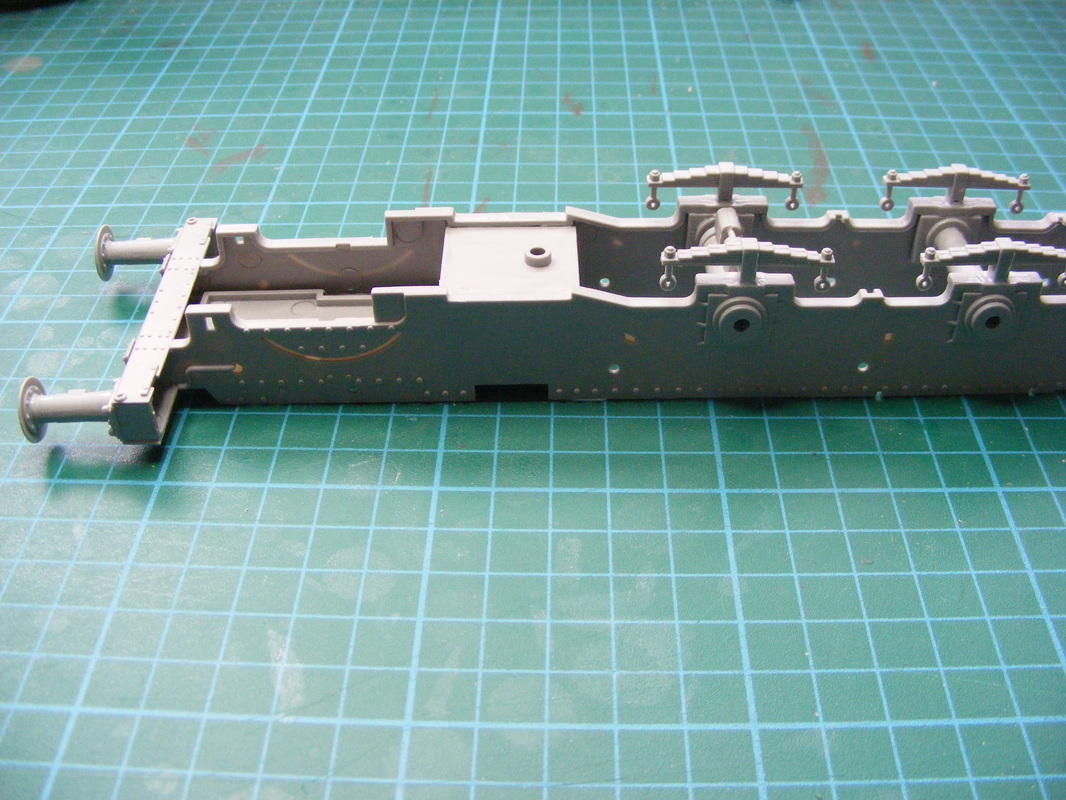
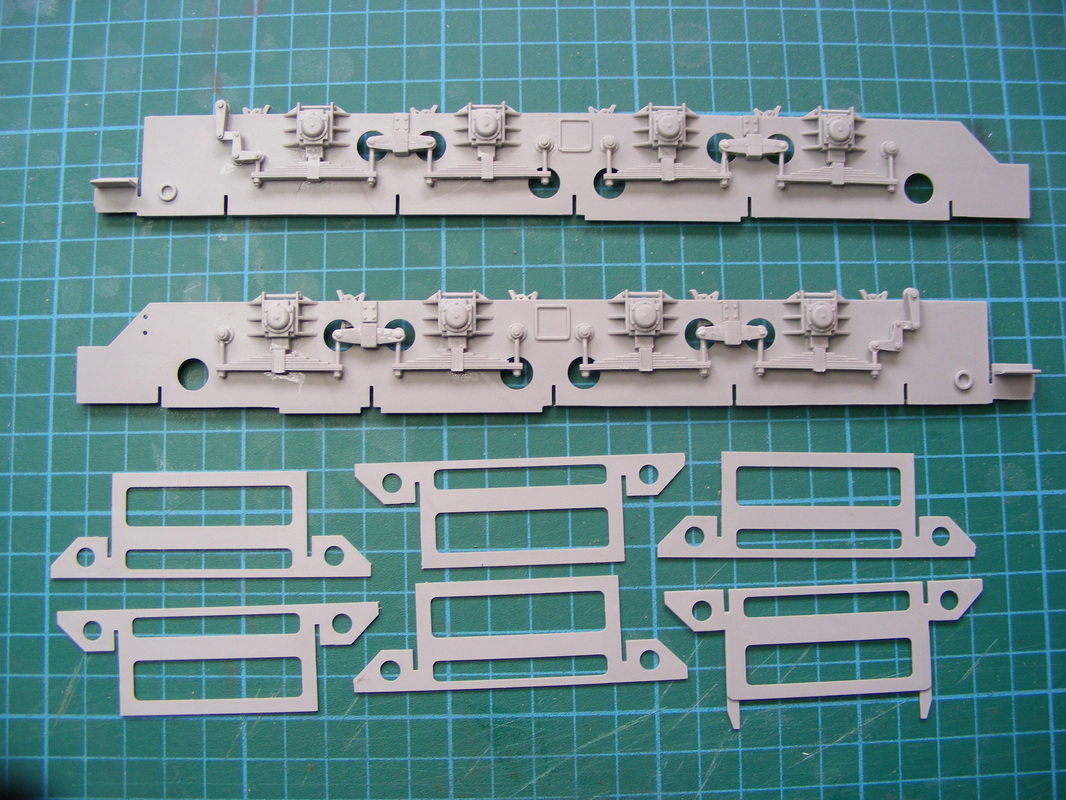
So, how are things progressing? Well, S.F.S.G. Having reached a stage on the tender, where it needs some pre-painting done before assembly, i decided to start and assemble the locomotive chassis up to the point where the etched brass replacement parts were to be fitted to the chassis.
Quite a lot of the larger brass parts are made up of more than one thichness, so i think this part of the build will definately be a little more challengiong, and a lot more patience will be required.